Push Notifications Setup
StarterAppKit comes with OneSignal push notifications pre-integrated. To enable push notifications in your app:


- Create an account on OneSignal if you haven't already
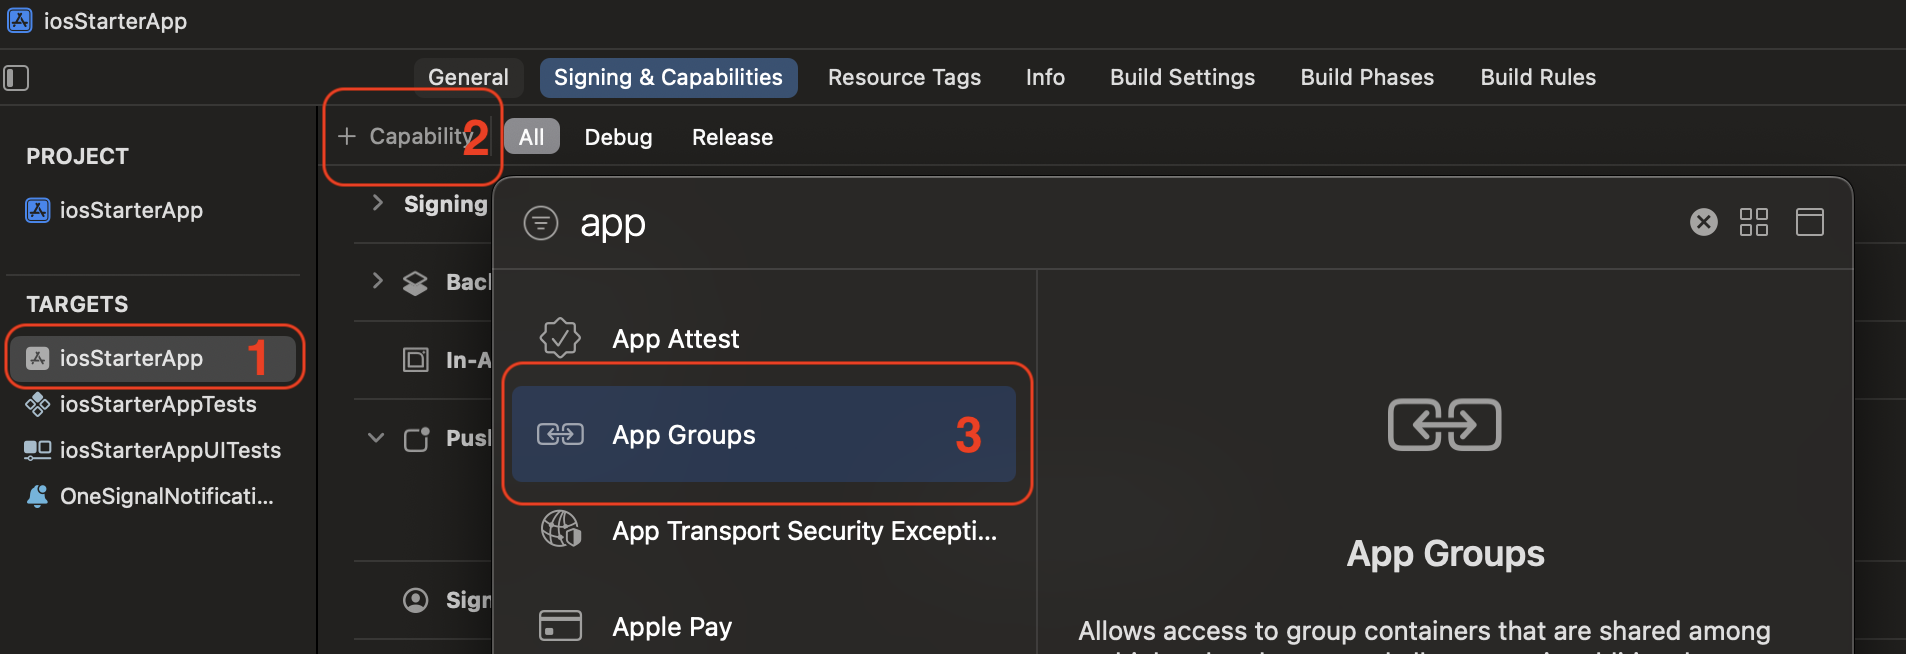
- Set up App Groups (required for push notifications):
- In Xcode, select your main app target
- Click "+" under Signing & Capabilities
- Add "App Groups" capability
- Click "+" under App Groups
- Create a new group ID:
group.{your-bundle-identifier} - Repeat the same steps for
OneSignalNotificationServiceExtensiontarget - Make sure both targets have the same App Group selected
-
Follow OneSignal's iOS setup guide to configure your app: iOS SDK Setup
-
Get your OneSignal App ID from the OneSignal dashboard
-
Add your OneSignal App ID to the app using one of these methods:
Option 1: Through Dashboard

- Log in to your StarterAppKit dashboard
- Add your OneSignal App ID in the app settings
- Download and replace the generated
Constants.swiftfile
Option 2: Manual Setup

- Open
Constants.swift - Replace the
oneSignalIDvalue with your OneSignal App ID:static let oneSignalID = "YOUR-ONESIGNAL-APP-ID"
That's it! Your app is now ready to receive push notifications. For more details about configuring and sending notifications, refer to OneSignal's documentation.
Note: Push notifications only work on physical devices, not in the simulator.