Authentication Setup
StarterAppKit provides built-in support for multiple authentication methods including:
- Email/Password & Magic Link authentication
- Google Sign-In
- Apple Sign-In
Before proceeding, ensure you've followed the Quick Start Guide to:
- Set up the backend environment
- Connect the app to your backend
Once those steps are complete, the basic email/password and magic link authentication will work out of the box.
To enable Google and Apple Sign-In, follow the steps below.
Apple Sign-In Setup
Good news: No additional steps are required for Apple Sign-In!
We've already integrated the necessary code to handle Apple authentication. As long as your backend and Apple Developer settings are configured correctly, Apple Sign-In is ready to use.
What does “correctly configured” mean for Apple Sign-In?
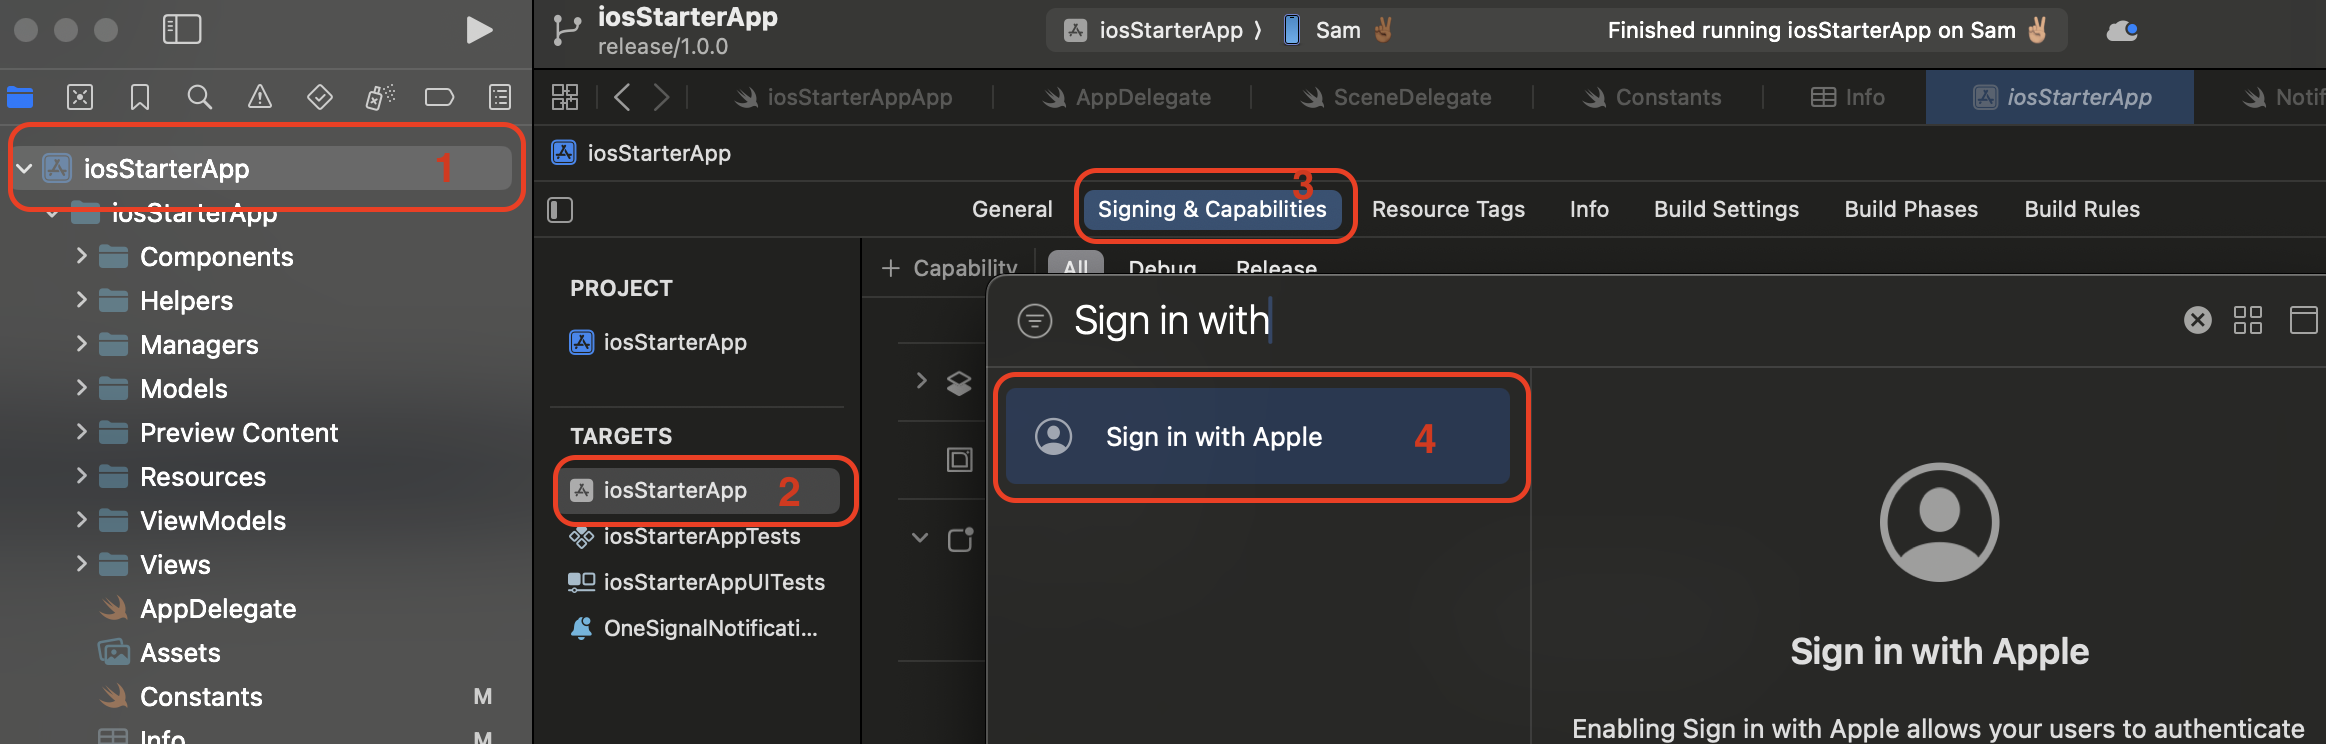
- Ensure that Apple Sign-In is enabled in your Apple Developer account for your app’s bundle identifier.
That's it. Apple Sign-In should now work as intended.
Google Sign-In Setup
To enable Google Sign-In, you’ll need to provide a few credentials in the iOS app’s Info.plist. This involves:
- Obtaining a Google Client ID from the Google Cloud Console
- Setting the corresponding URL Schemes in your Xcode project
Steps to Obtain Your Google Client ID
- Go to the Google Cloud Console.
- Create or select an existing project.
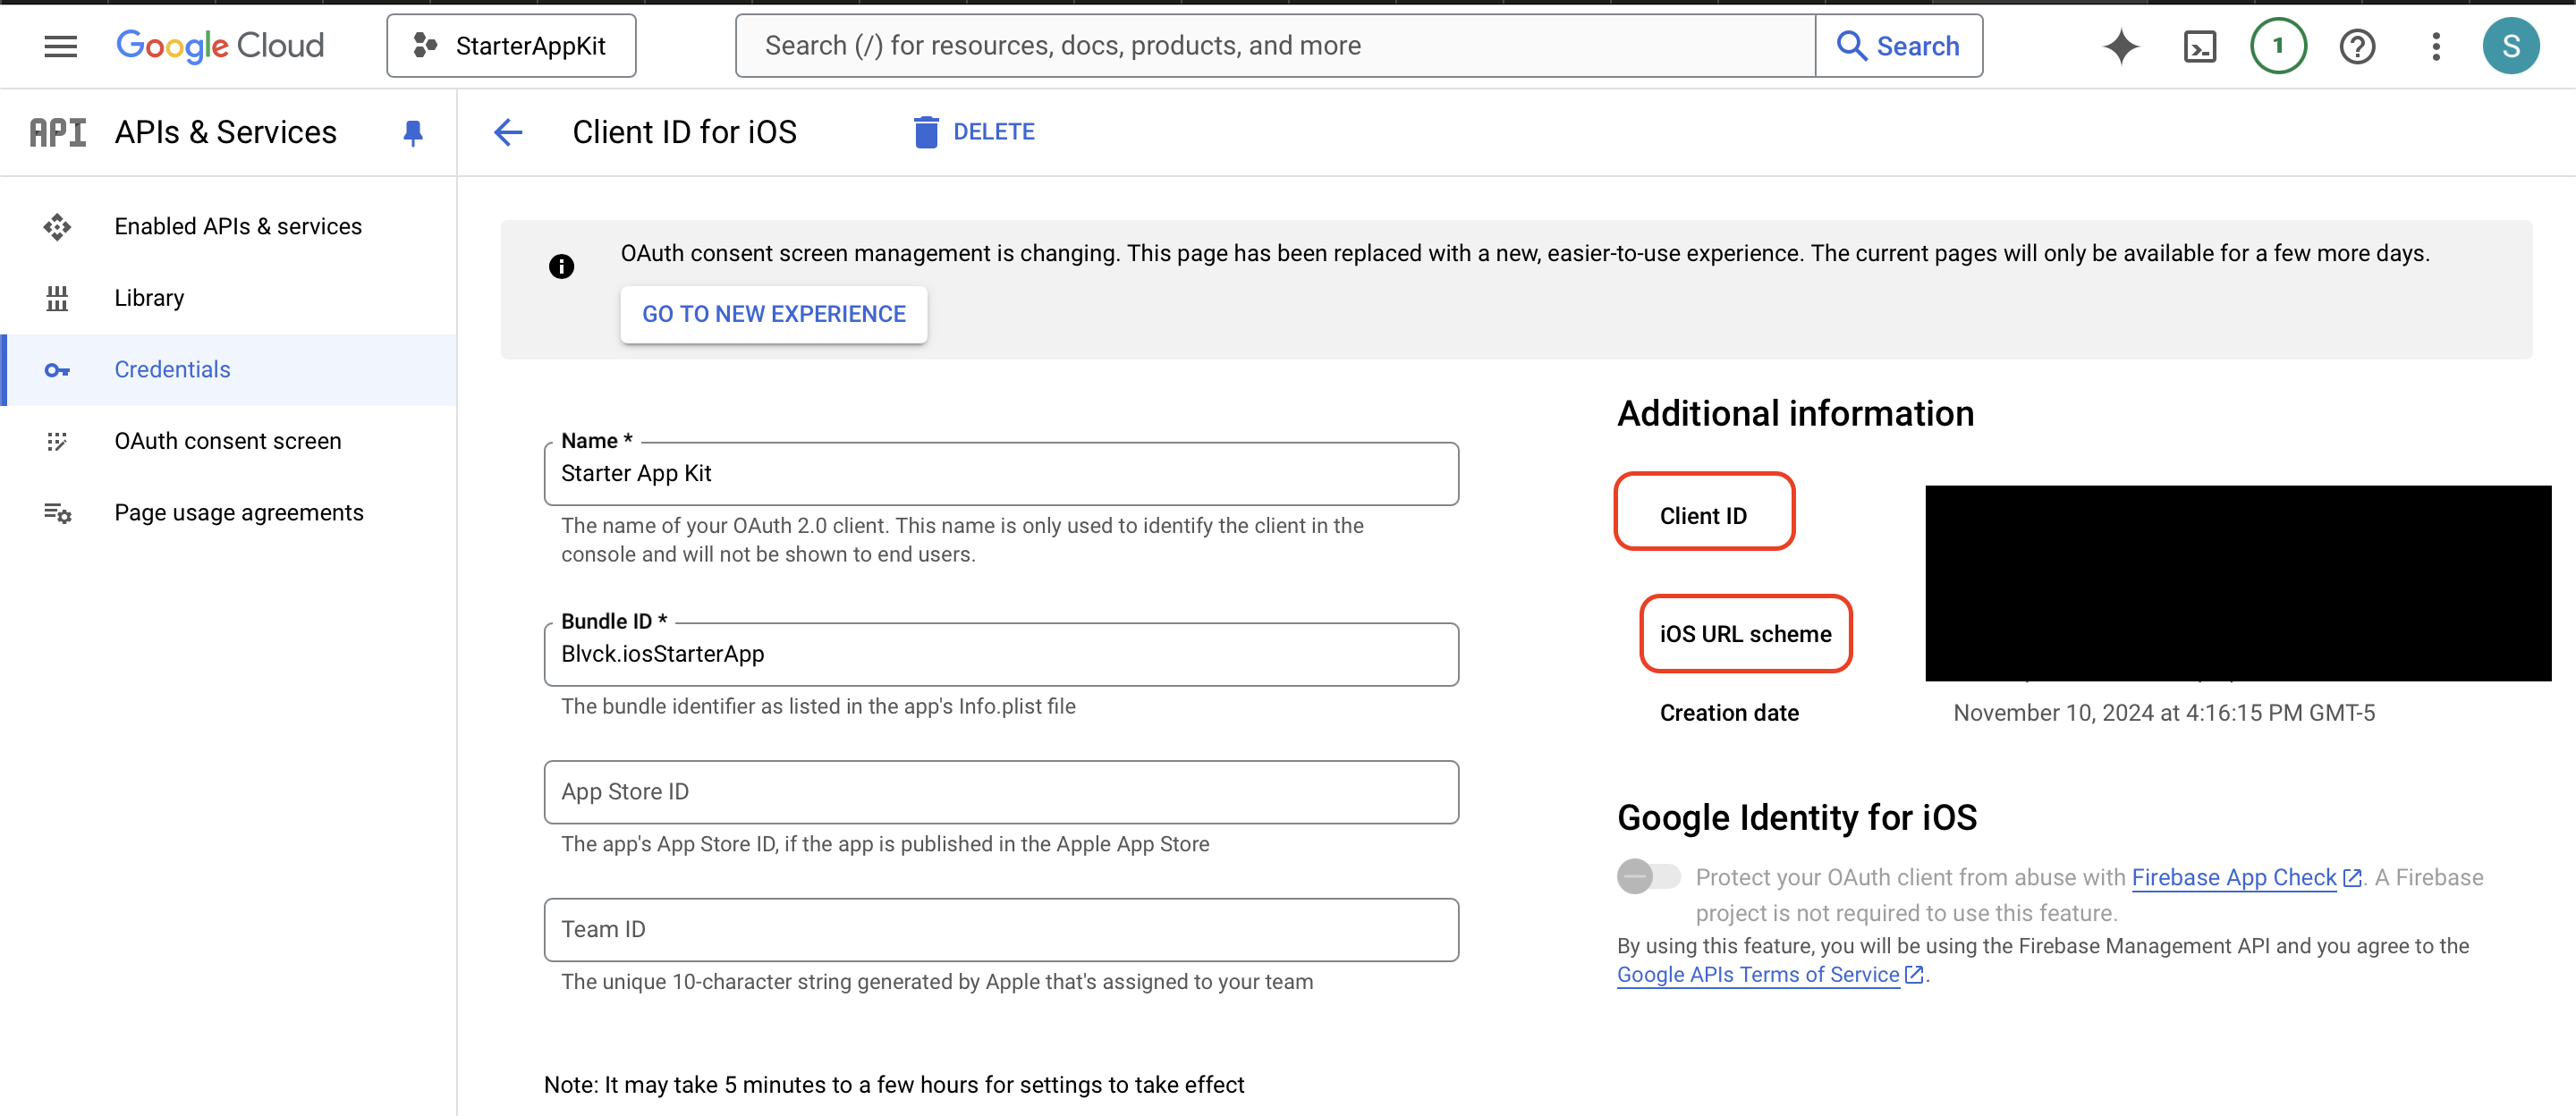
- Navigate to the APIs & Services > Credentials section.
- Create an OAuth 2.0 Client ID (iOS type).
- Copy the generated
iOS URL schemeand theClient ID.
Your REVERSED_CLIENT_ID looks something like this: com.googleusercontent.apps.1234567890-abcdefg
This reversed ID will serve as your URL Scheme.
Updating the Info.plist
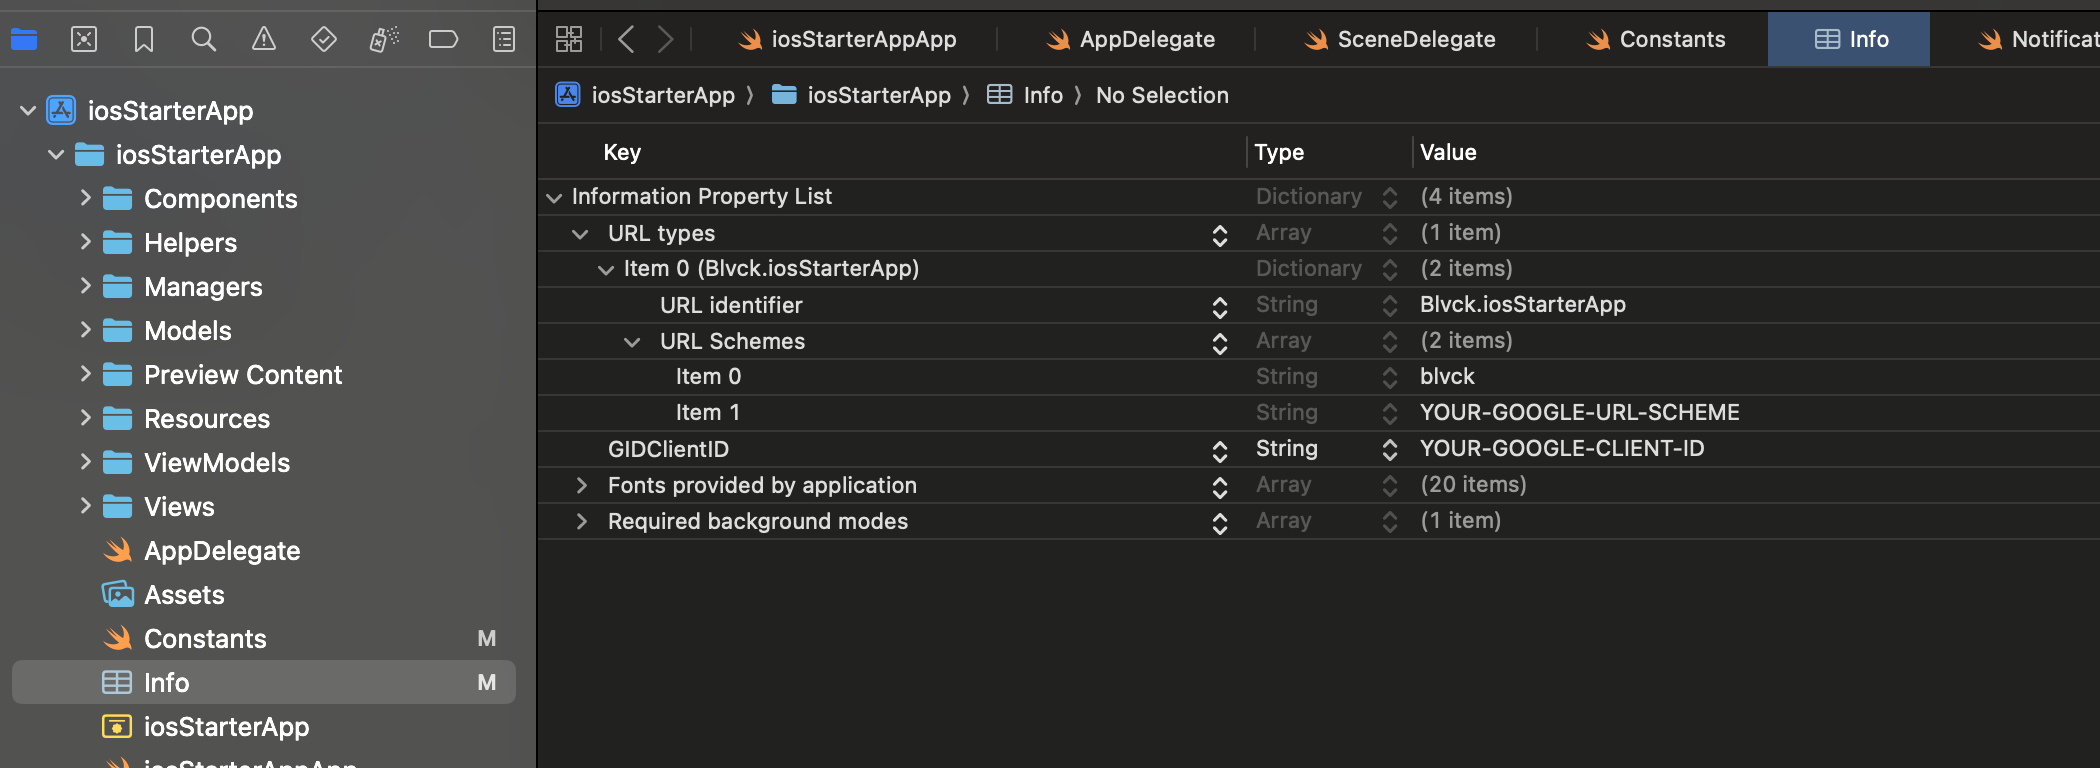
Location: iosStarterApp/Info.plist
Add the following entries to your Info.plist:
- URL Scheme: Replace the value of
YOUR-GOOGLE-URL-SCHEMEwith theiOS URL schemecopied from your Google Cloud Console. - GIDClientID: Replace the value of
YOUR-GOOGLE-CLIENT-IDwith theClient IDcopied from your Google Cloud Console.
That's All you have to do for the mobile app!
Backend Setup
On the Backend ( Server Code ), you only need to set the value of GOOGLE_CLIENT_ID in your .env file. Once this is set, you should be able to start using Google Auth in your app.